Set Up CacheFly with CDN Enabler Plugin for WordPress
To rewrite URLs in a WordPress website when using CacheFly Reverse Proxy, you can use the CDN Enabler plugin for WordPress.

Installing and Activating the CDN Enabler Plugin
To install the CDN Enabler plugin for your WordPress website:
Log into your WordPress admin dashboard
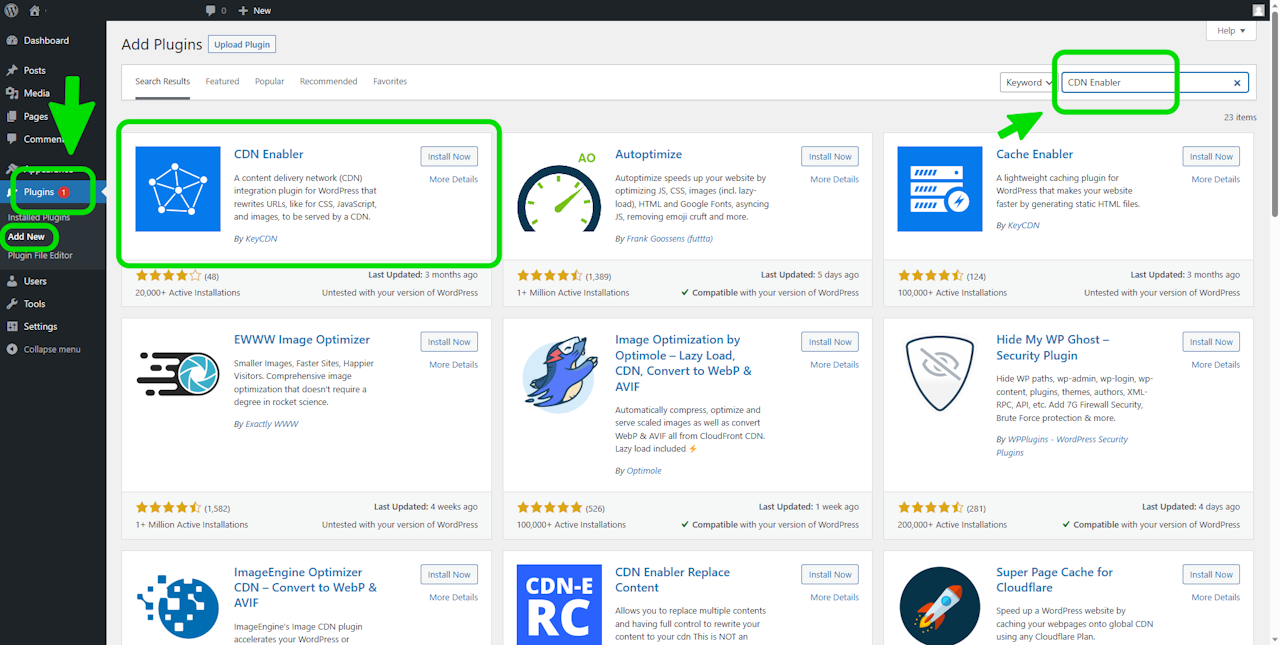
Click on Plugins and then on Add New
Enter CDN Enabler in the plugin search field for WordPress to show you this plugin
Click on the Install Now button for CDN Enabler
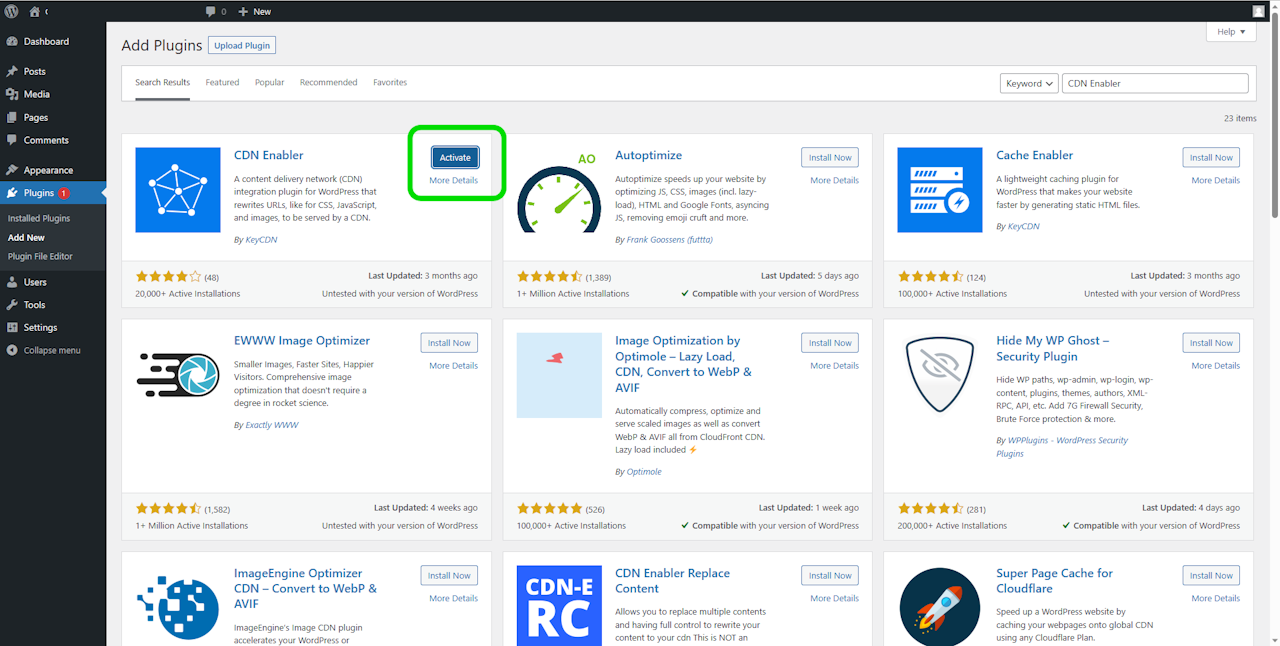
After installation, click on the Activate button.
Scroll the graphics in this step horizontally to see all the screens.

Rewriting your URLs with CDN Enabler
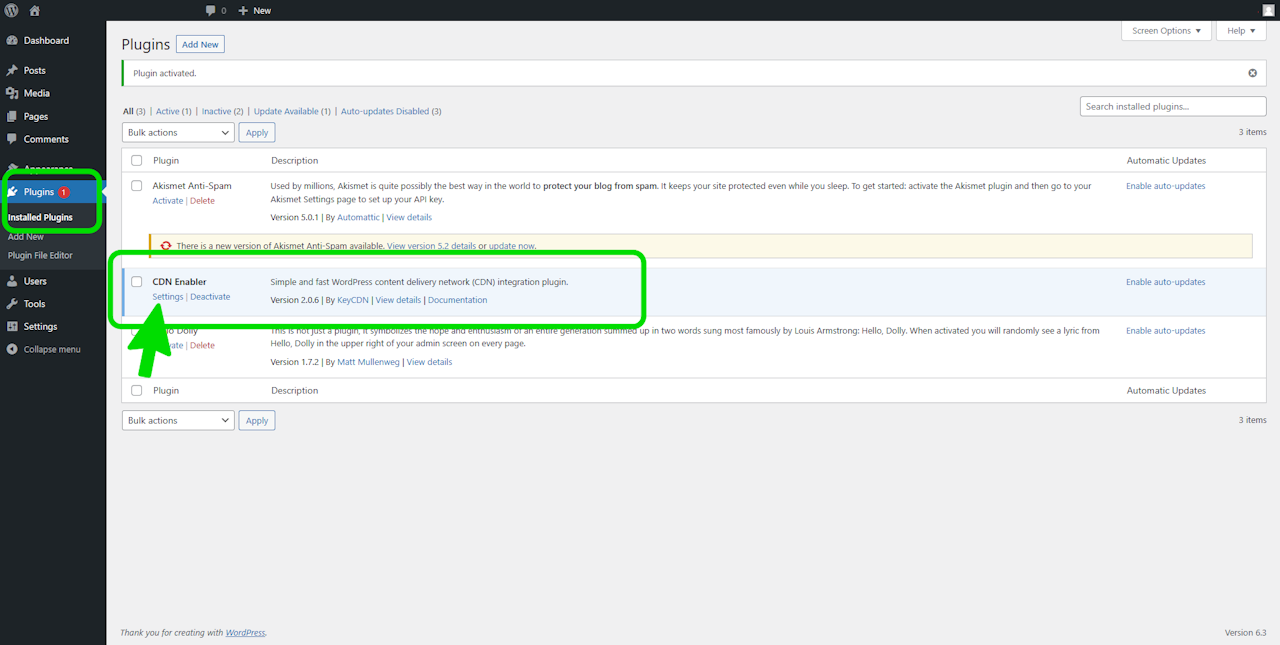
After installing and activating the CDN Enabler plugin via your WordPress admin dashboard, navigate to the list of installed plugins.
Click on the CDN Enabler settings link in the list of installed plugins for your WordPress site
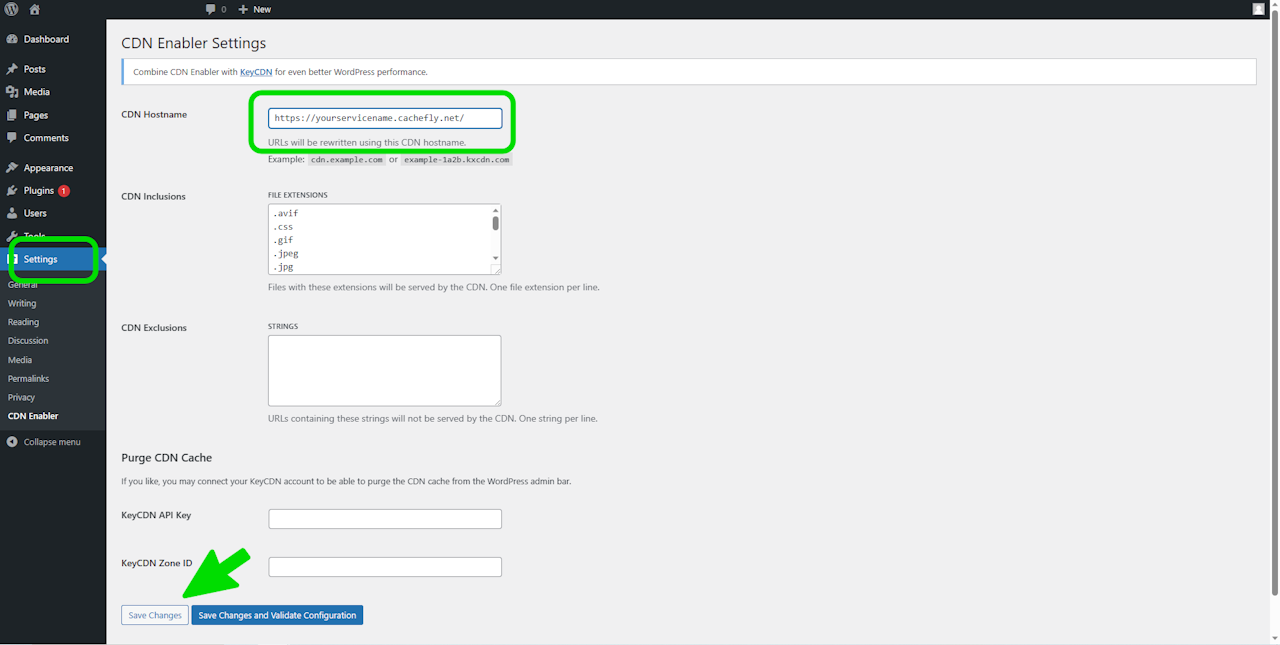
In the CDN Enabler configuration screen that appears, enter your CacheFly service URL/subdomain (for example, https://yourservicename.cachefly.net/) in the CDN Hostname field
If you have created a CNAME alias for your CacheFly subdomain, you can use it here as well
Click Save Changes.
Scroll the graphics in this step horizontally to see all the screens.
Your WordPress HTML source should now be referencing static files from your CacheFly account.
