


Creating an Object Storage Account
To use CacheFly's Object Storage with a CDN service, you will first have to create a CacheFly Object Storage account. To create an account:
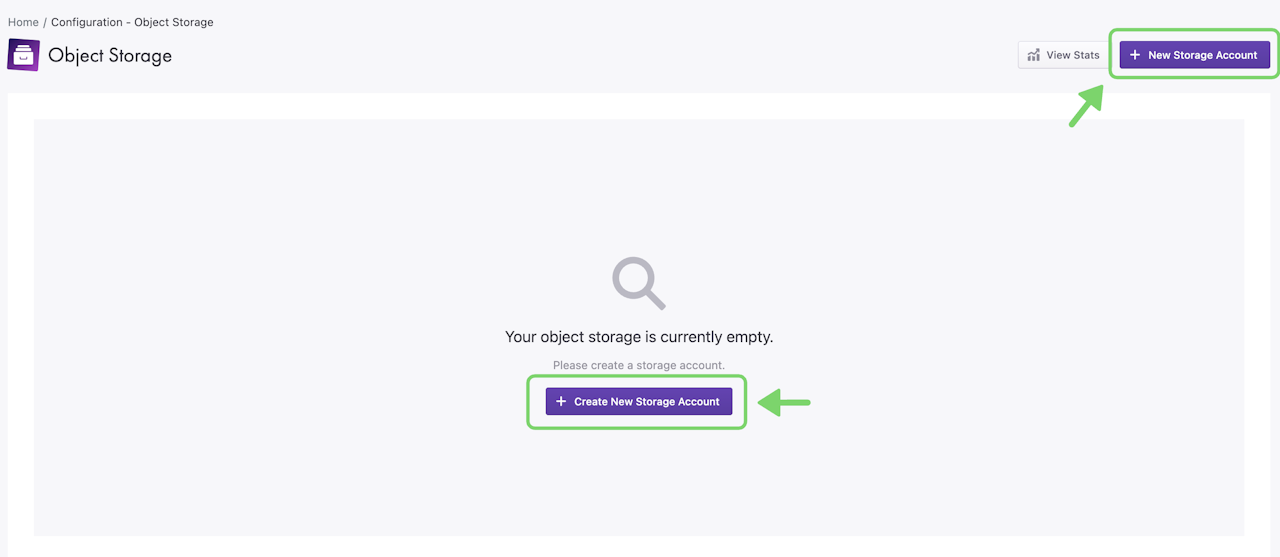
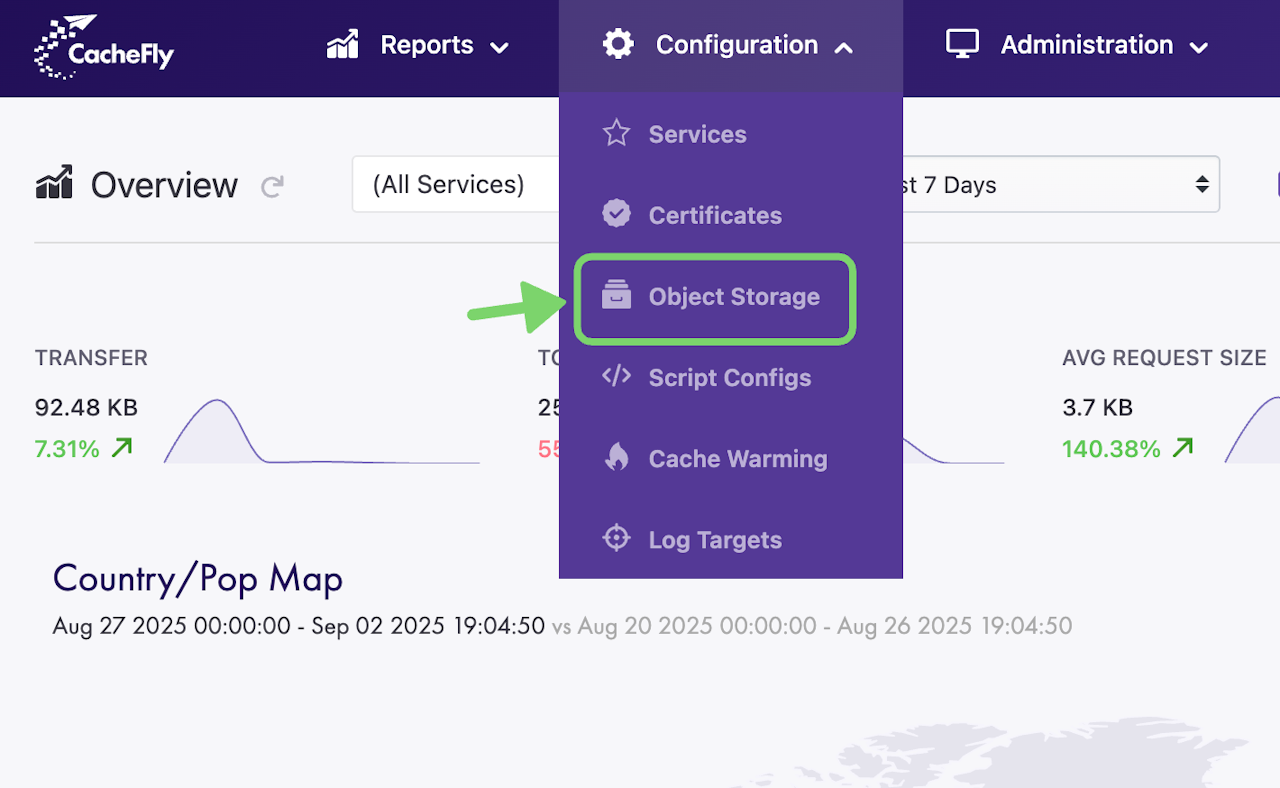
Navigate to Configuration > Object Storage
Then Click + Create New Storage Account or + New Storage Account
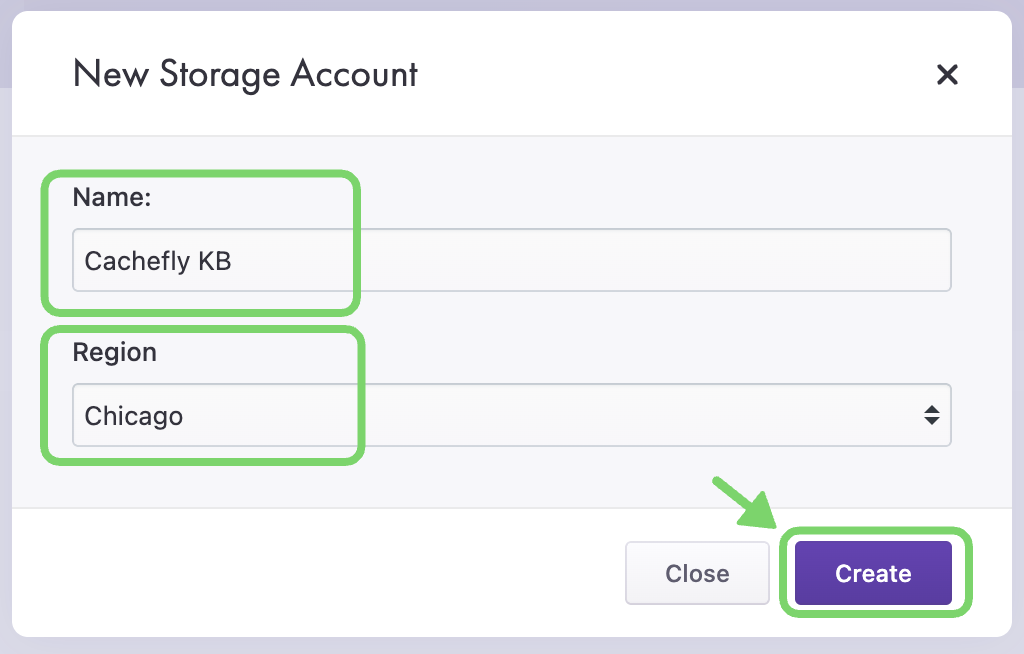
Follow the prompt to give the new CacheFly Object Storage account a name and select the region you would like to use
Click Create
Scroll the graphics horizontally to see all the screens.

Object Storage Clients
After a CacheFly Object Storage account is created, you will need to access it to create buckets and start uploading objects.
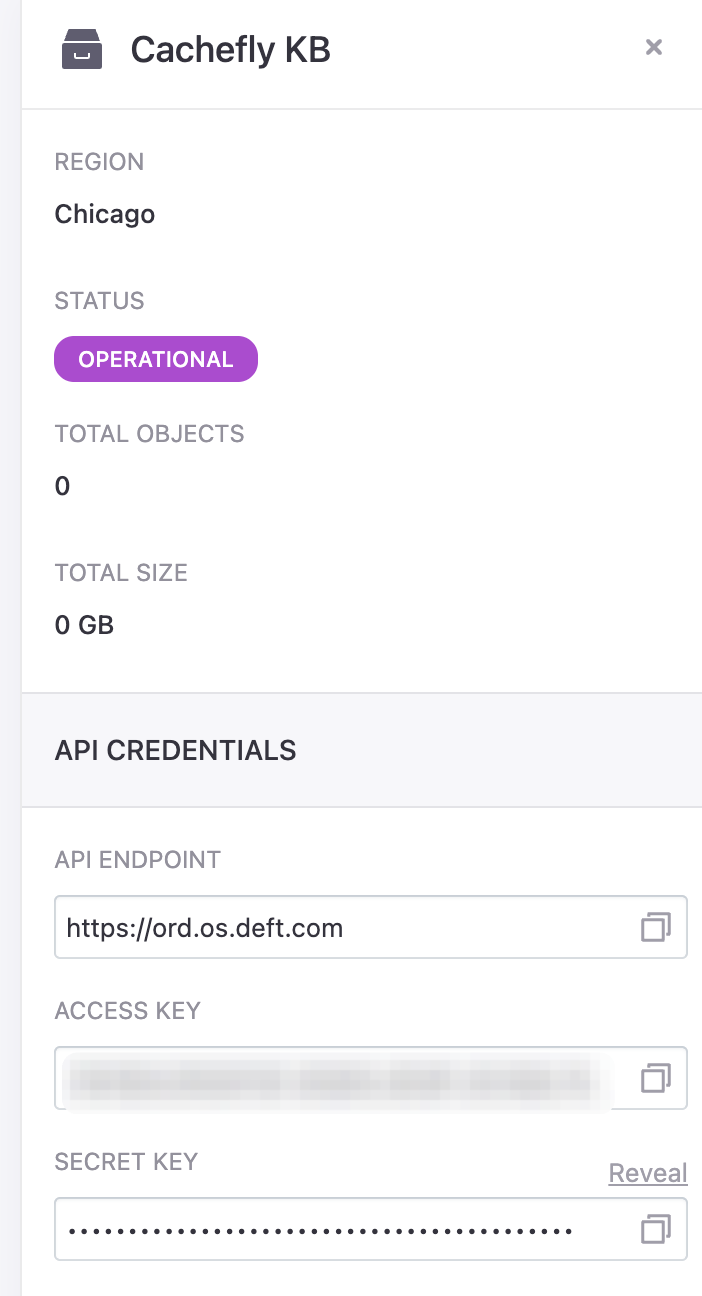
To access the Object Storage account, click View API Credentials on the Object Storage page to see the details of the account, including the API endpoint and credentials to login to your Object Storage account.
As the CacheFly Object Storage is Amazon S3 compatible, many tools exist to access the account. Below are some recommendations we suggest for accessing your Object Storage account.
GUI-based clients
Cyberduck (Mac and Windows): https://cyberduck.io/
S3 Browser (Windows): https://s3browser.com/
Command Line Interface (CLI) based client
The API credentials will be used to login to the Object Storage client of your choice.

Adding Buckets and Uploading Objects
Once you have access to your CacheFly Object Storage account, you will need to create at least one bucket where objects can be uploaded to.
To add a bucket, log in to the CacheFly Object Storage account using the API credentials and the object storage client of your choice and create a folder in the root of the Object Storage account, which will become a bucket.
Once the bucket is created, you can start uploading objects to that bucket. Within a few minutes, the portal will display the bucket as well as the number of objects and space used.

Using Object Storage as a Reverse Proxy
Any CDN service can be configured to use the CacheFly Object Storage as a Reverse Proxy.
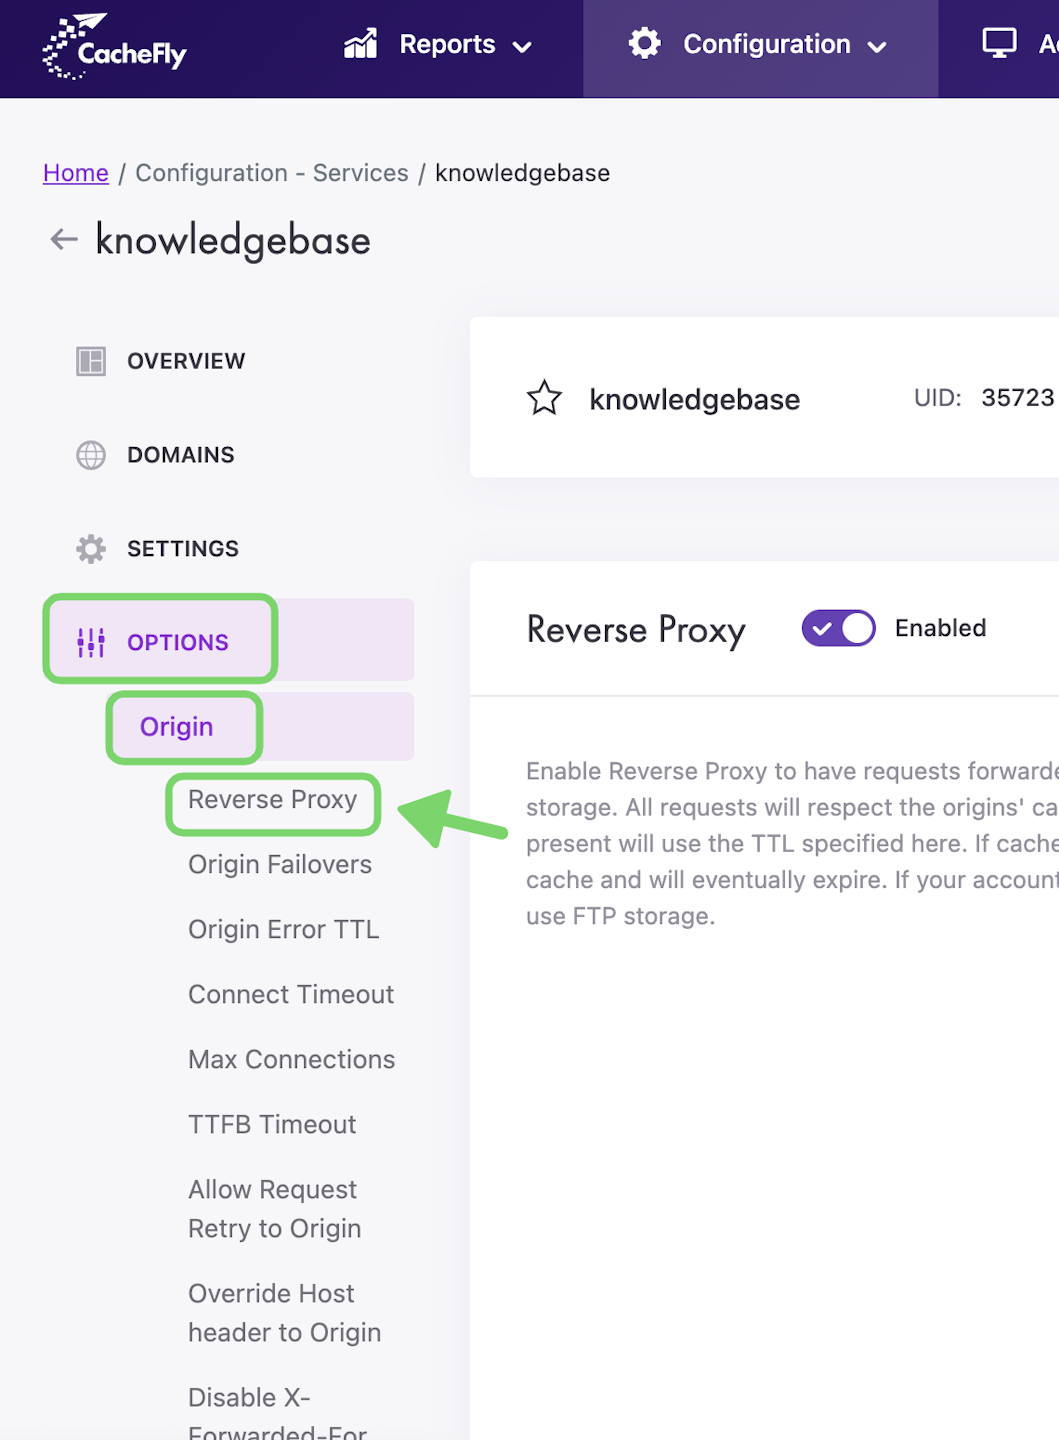
To set up a CacheFly Object Storage bucket as a reverse proxy for a service, first navigate to that service (Configuration > Services > [SERVICE NAME]).
On the left of the screen, click on OPTIONS to expand the list of options available. Then click on ORIGIN to expand the origin features. Click on Reverse Proxy in the list or scroll if necessary to display the Reverse Proxy section.
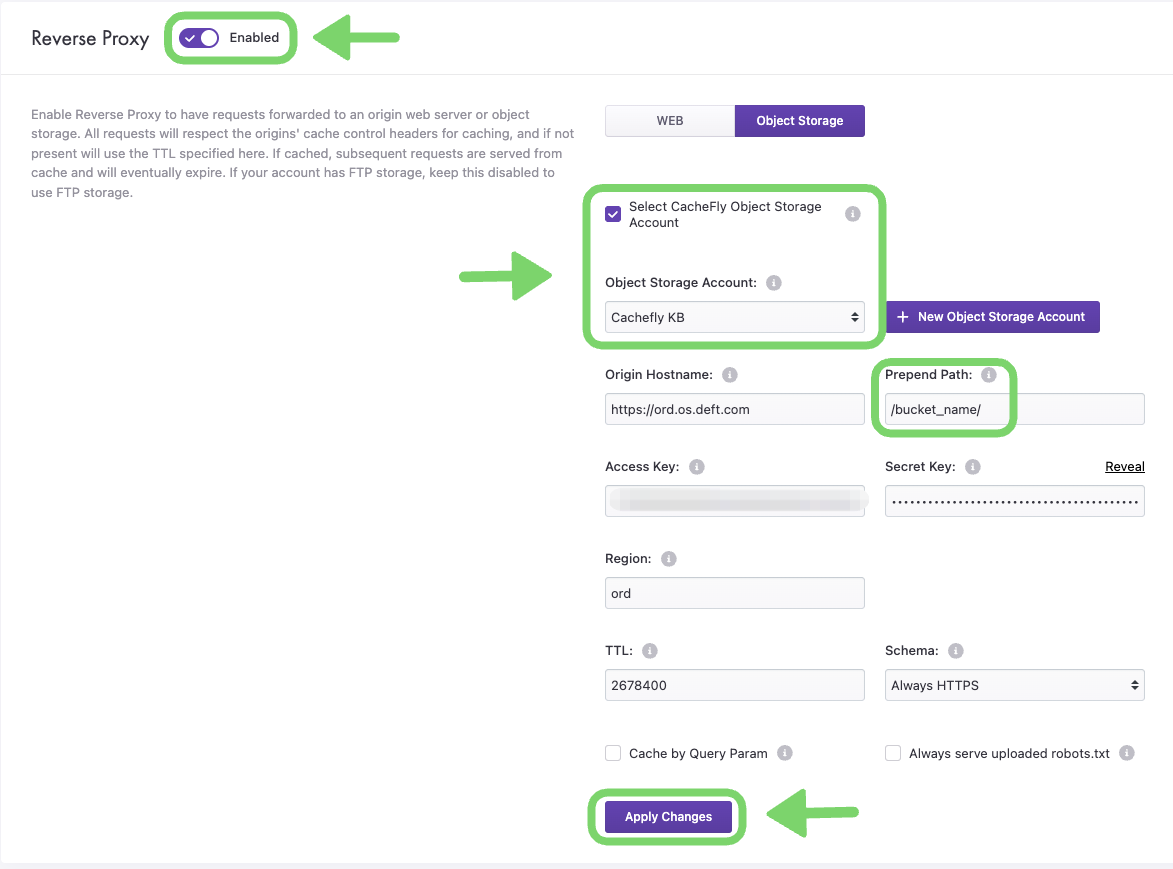
Initially, the Reverse Proxy button/toggle is gray and shows Disabled. To enable Reverse Proxy, click the button/toggle (it then turns blue and shows Enabled).
Select the Object Storage reverse proxy tab and check Select CacheFly Object Storage Account and choose the CacheFly Object Storage account to be used. In the Prepend Path field, enter the bucket name that should be used with the service.
Remember to click the Apply Changes button to save your changes.

